How to Make Potstickers (No Perfect Folds Required!)
Last updated on March 12, 2026 by Jessica Healey
Originally published on December 10, 2024
When I was in high school, my mom and I decided to make homemade dumplings together. It’s a core memory that we still talk about today. We had no idea what we were getting into. We spent hours carefully shaping each dumpling to perfection—meticulously folding each one so it looked restaurant-ready. Were they delicious? Absolutely. Were they worth the time we spent? Maybe… but now that I’m older and wiser, I’ve learned an important lesson: potstickers don’t have to be perfect to be amazing.
If you’ve ever thought, “I don’t know how to fold potstickers, so I won’t even try,” I’m here to say don’t stress it. This recipe is easy, forgiving, and fun. Perfect folds? Not necessary. Delicious results? Absolutely guaranteed.
Why This Potsticker Recipe Works
There are plenty of “perfect” dumpling tutorials out there, but this one is different. Here’s why you’ll love it:
- Freezer magic: These potstickers freeze beautifully, so you’ll always have an easy, homemade option ready for dinner.
- No pressure folding: Triangles, pouches, messy bundles—it doesn’t matter. If the edges are sealed, you’re good to go.
- Family-friendly fun: Gather your family, laugh at the shapes, and enjoy making a meal together.
What You’ll Need
The ingredients are simple, customizable, and packed with flavor:
Why You’ll Love These Dumplings
First, let’s talk about the freezer. When I make these dumplings, I always double (or triple) the recipe. Why? Because once they’re frozen, they’re basically tiny dinner superheroes. My family has so much fun coming up with new ways to use them.
- Pan-fried with a side of soy sauce? Done.
- Dropped into simmering broth for a quick soup? Perfect.
- Tossed into ramen noodles for a cozy upgrade? Yes, please.
I keep a stash in the freezer at all times because these little pockets of joy are a lifesaver on busy nights. Plus, when Ollie and Nick ask, “What’s for dinner?” I can say dumplings and watch their faces light up.

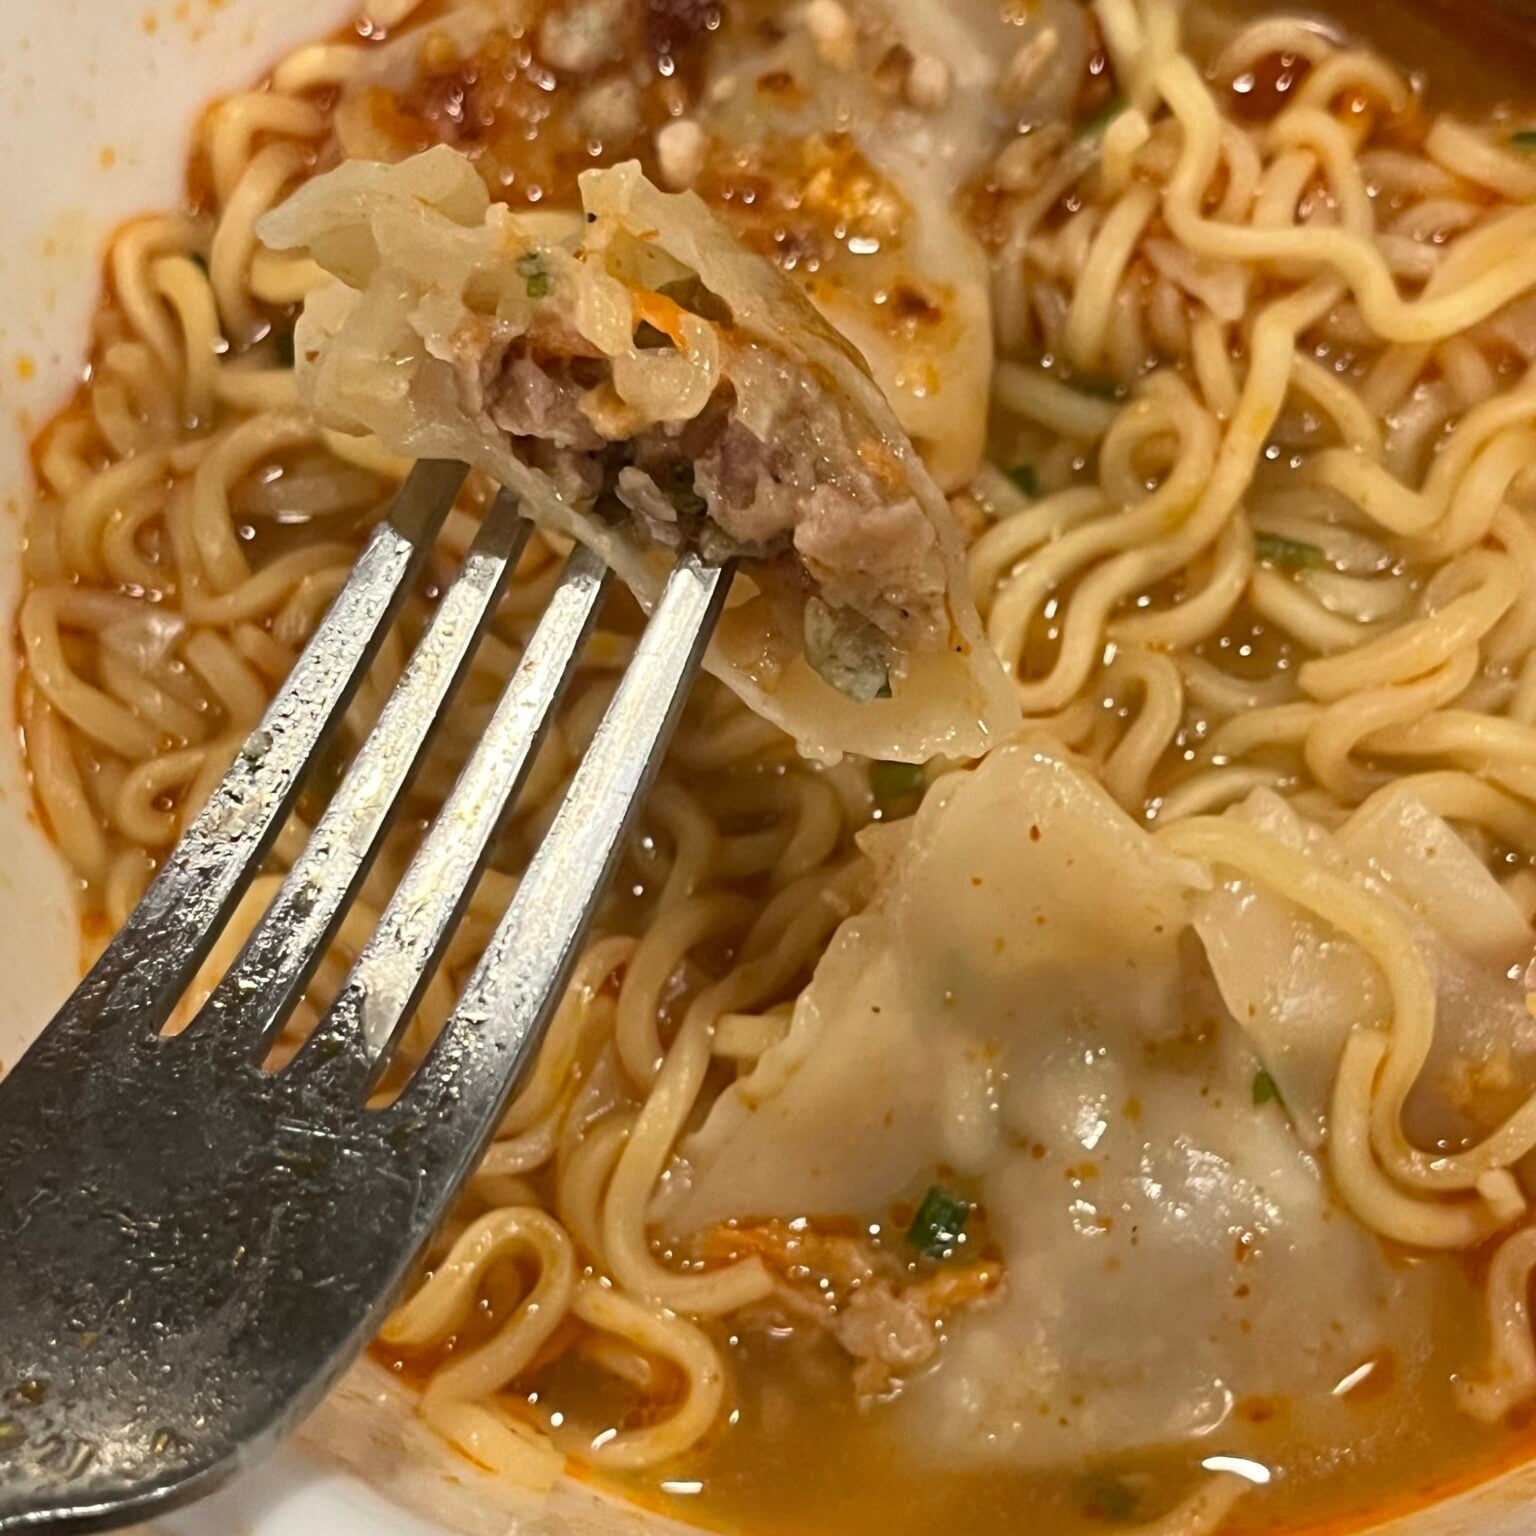
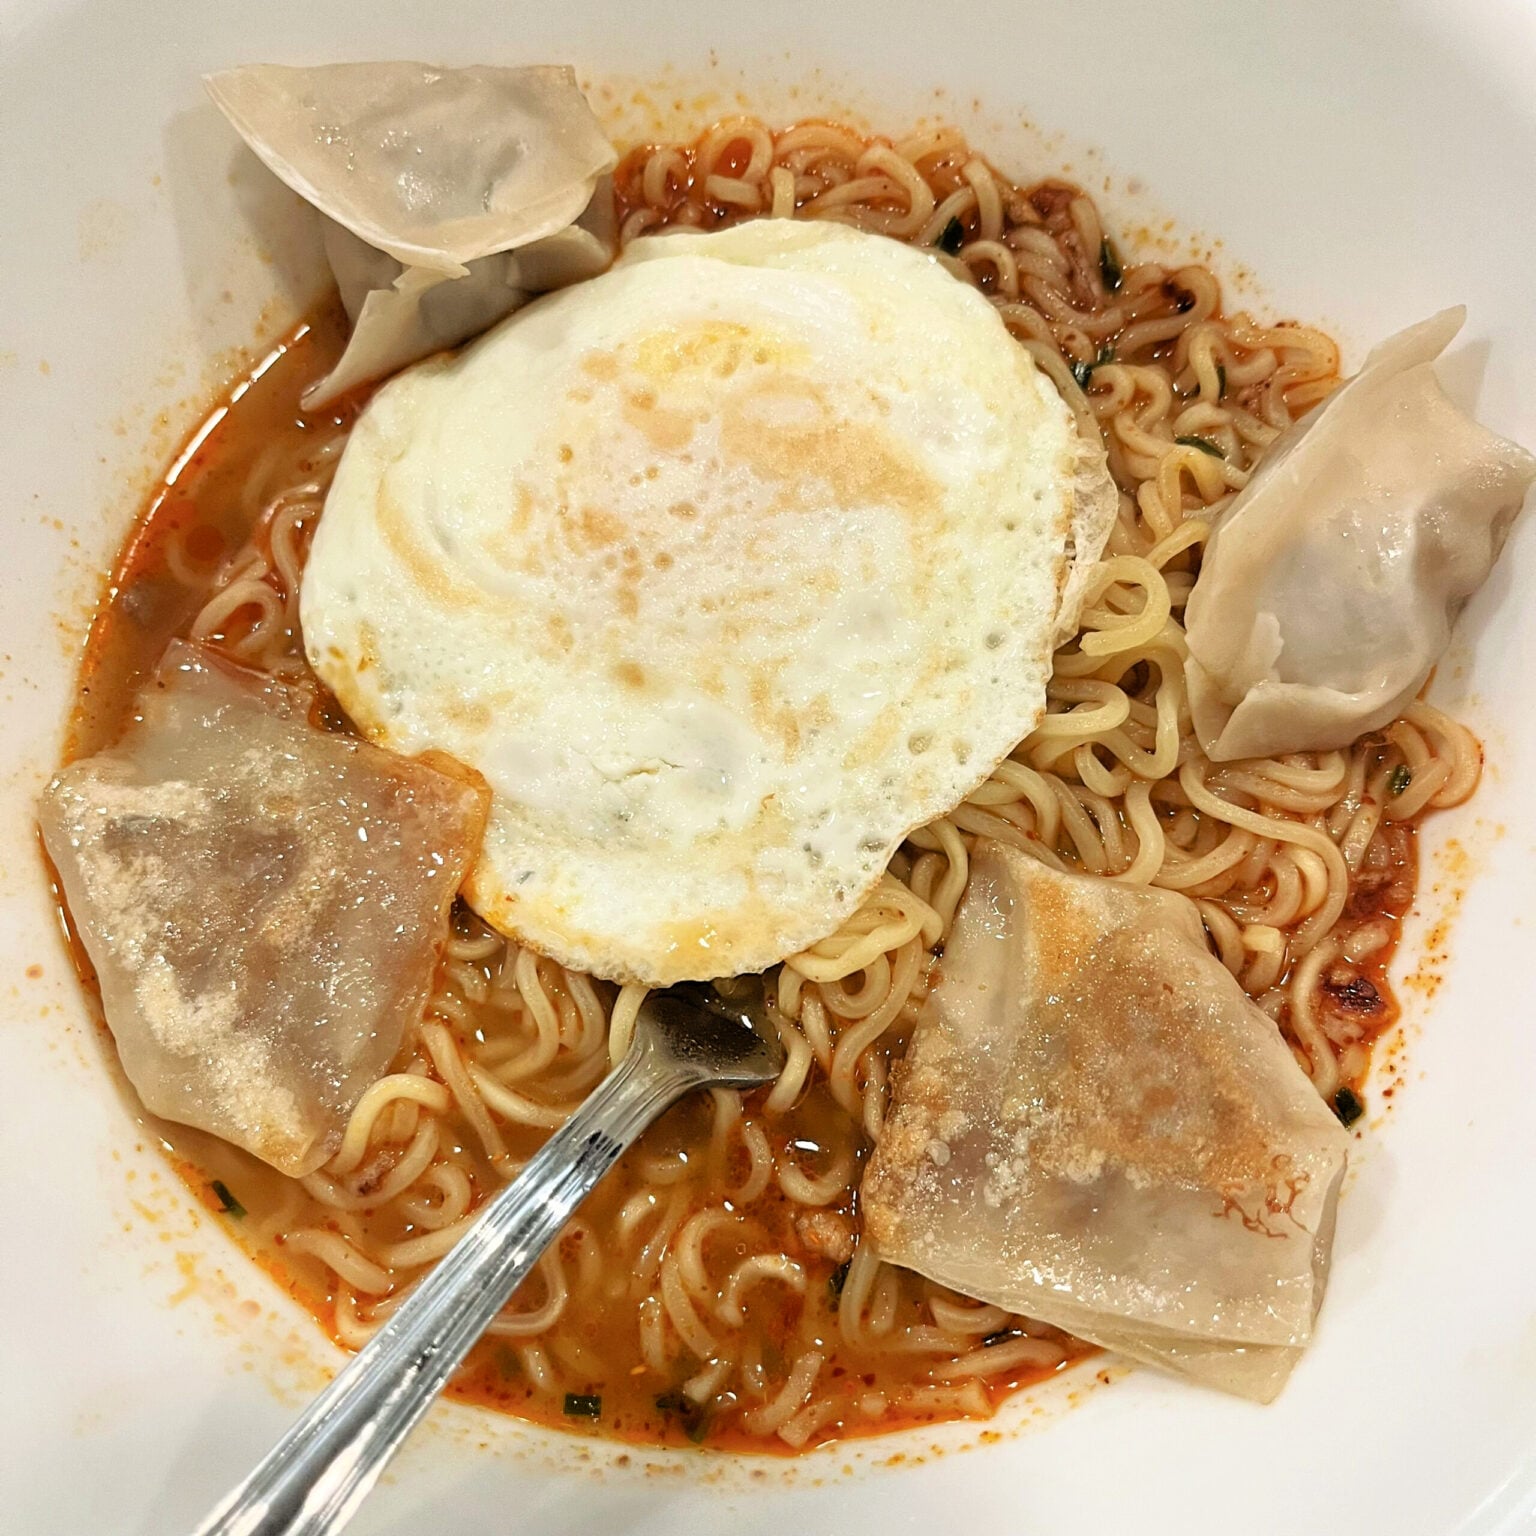
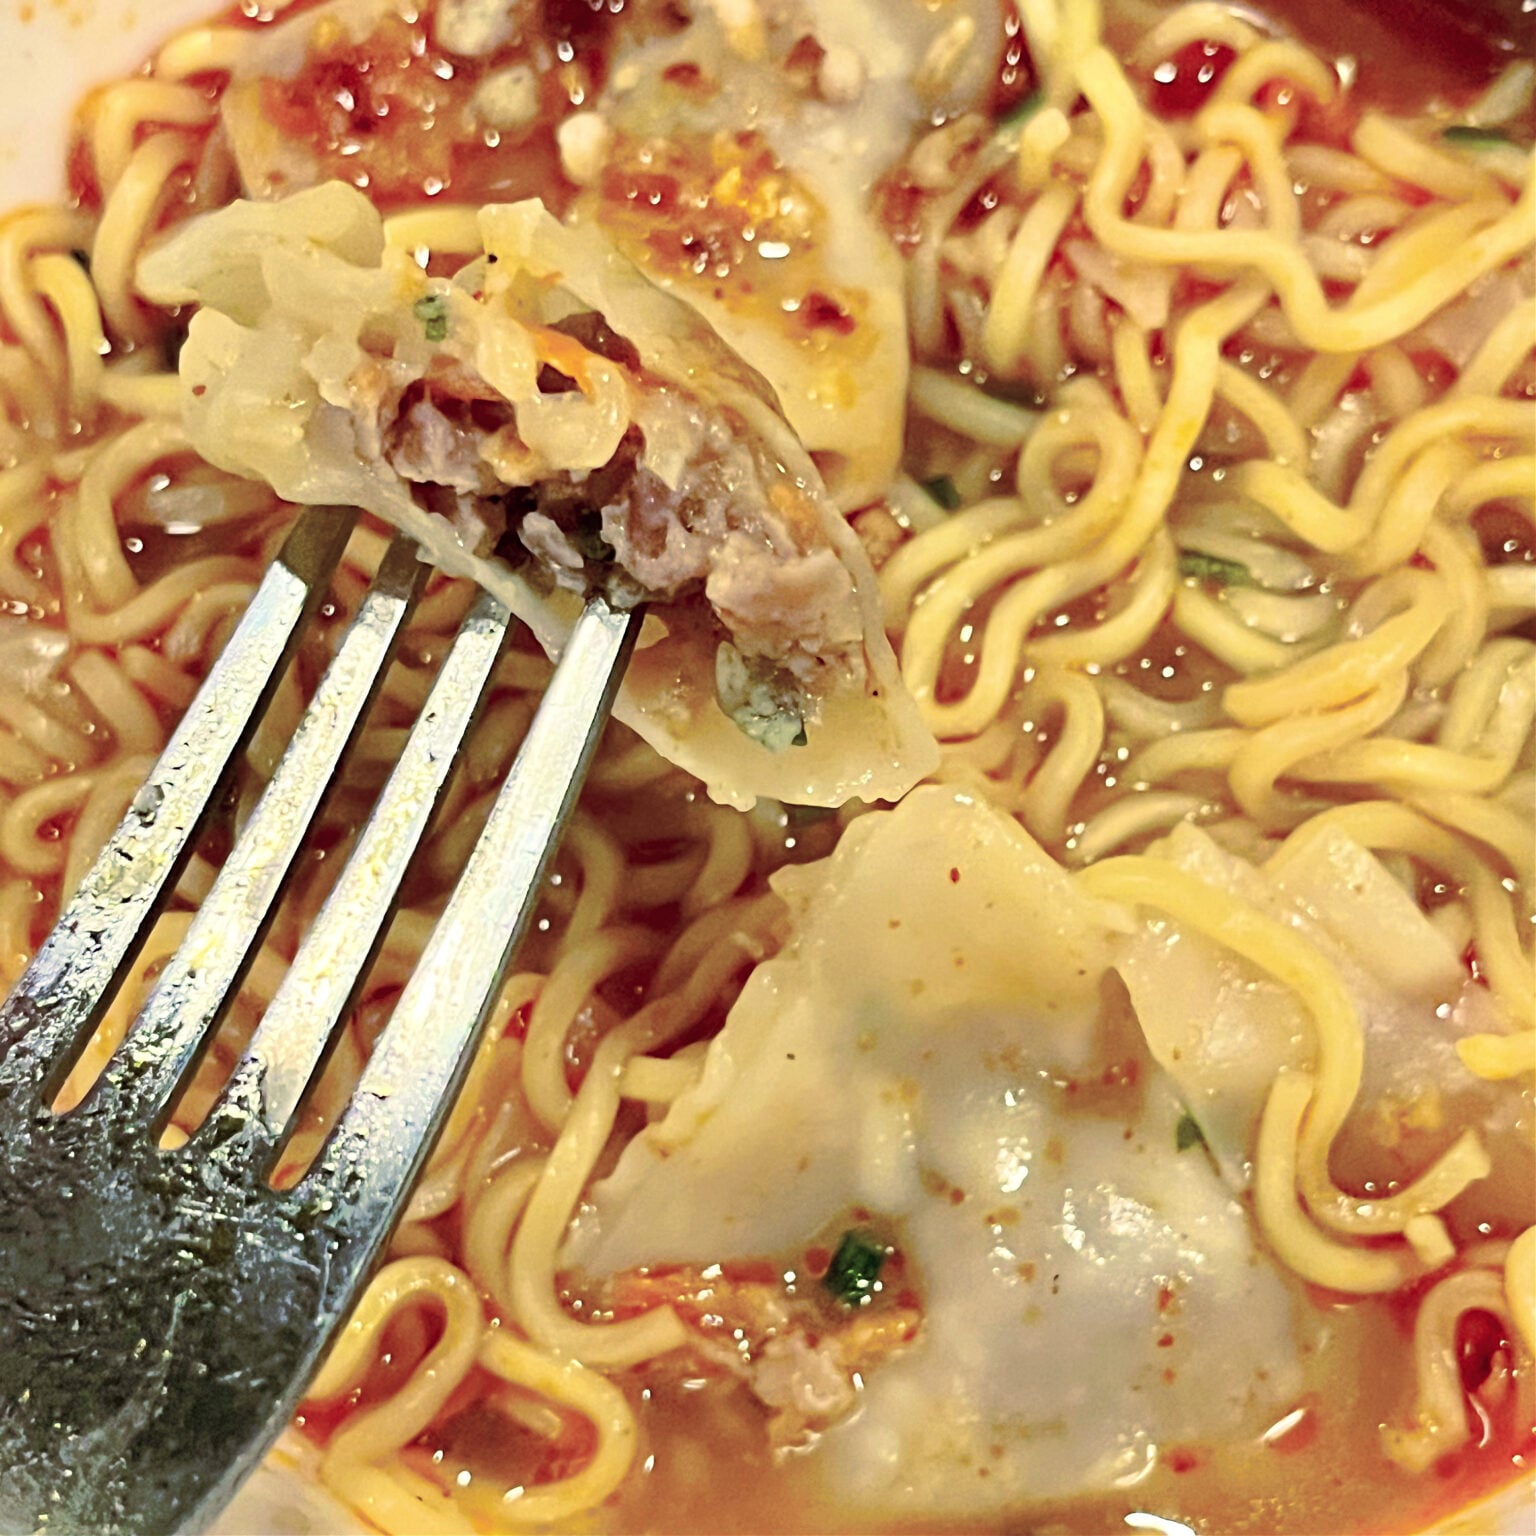
Potstickers in Ramen? Sure! Add an egg? But, of course!
Folding Potstickers: Don’t Overthink It!
If you’re wondering how to fold potstickers, here’s the best advice I can give: don’t worry about it. Seriously.
- Place a teaspoon of filling in the center of a wrapper.
- Wet the edges with a little water.
- Fold it into whatever shape feels easiest—triangles, pouches, or even little bundles.
- Press the edges to seal it completely. That’s the only part that matters.
If you’re cooking with kids or friends, embrace the creativity. We’ve made triangle potstickers, scrunched bundles, and flat little pillows. Every version turns out tasty, and everyone has a good laugh in the process.
And honestly, this approach makes dumpling-making so much more fun. It’s a great way to get everyone involved. My family has turned it into a mini tradition: we all stand around the table, folding dumplings, listening to music, and laughing at each other’s “creations.”
Cooking Potstickers: The Hybrid Method
My favorite way to cook potstickers is a mix of frying and steaming—the hybrid method. It’s easy, reliable, and gives you that crispy bottom and soft, tender bite.
- Heat a large non-stick skillet over medium heat with a little oil and water.
- Place the potstickers in a single layer. Cover the pan and let them steam for 3-4 minutes.
- Once the water evaporates, uncover the pan, crank up the heat, and let them fry until the bottoms are golden and crispy.
You can also cook these straight from the freezer with this method. Just add a minute or two to the steaming time.
How to Serve Potstickers
These potstickers pair perfectly with a simple dipping sauce. My go-to? Equal parts soy sauce and rice vinegar. If you want a little heat, add a dash of chili oil or red pepper flakes. If you want to get just a bit fancier, this is a great potsticker sauce recipe.
They’re also great as:
- A ramen upgrade for cozy nights in
- A quick weeknight dinner with steamed veggies
- A tasty soup add-in (just boil them in broth!)
Make-Ahead & Freezing Tips
Here’s the real game-changer: these potstickers freeze beautifully. Once you’ve assembled them, lay them out on a parchment-lined baking sheet and freeze until firm. Then toss them in a zip-top bag and store them for months.
Cooking them from frozen is just as easy—use the hybrid method, drop them into boiling soup, or steam them. Having these little pockets of joy ready to go makes dinner a breeze.
Ready to Make Potstickers? Let’s Do It!
Whether you’re folding perfect triangles or scrunchy little bundles, this recipe proves one thing: potstickers don’t need to look perfect to taste incredible. So roll up your sleeves, grab some egg roll wrappers, and have fun with it. The shapes will be imperfect, the laughs will be plenty, and the flavor? Unbeatable.

How to Make Potstickers (No Perfect Folds Required!)
Ingredients
- 1 package egg roll wrappers 20 wrappers (after cutting makes 80 wontons)
- 1 pound ground chicken or ground turkey (or 1/2 lb each)
- 1 cup carrots grated
- 1 small onion grated or finely diced
- 4-8 cloves garlic minced (I say more is better!)
- 1 teaspoon sesame oil
- ⅕ cup soy sauce
- 4 teaspoons rice vinegar optional, but tasty
- 1 teaspoon salt
- 4 teaspoons dried cilantro or chives (if fresh, use ¼ cup)
- 1 tablespoon sesame seeds optional, for garnish
Instructions
Make Dumplings
- Make the Filling: In a large bowl, combine all ingredients (except sesame seeds). Mix everything until well combined. See notes below for additional optional filling add-ins.
- Cut Egg Roll Wrappers: Using a chef's knife, cut the stack of egg roll wrappers in half twice so you have 80 equal size square wrappers.
- Assemble Dumplings: First, don't overthink it! Unless you want to master making the perfect dumpling, don't even try. These little friends are so tasty, you and your friends or family won't care what they look like! Whatever the shape – triangle, little pouch, round, flat – doesn't matter. What DOES matter is ensuring that each dumpling is sealed shut all the way around. However you accomplish that will work just fine!Place about a teaspoon of filling in the center of each egg roll wrapper. Wet the edges of the wrapper with a little water (I keep a bowl of water in front of me and dip my fingers in it to wet the wrapper all the way around), fold the edges over to make a triangle (or whatever shape works for your hands!), and press the edges to seal.
Fry, Steam, Hybrid Method, or Freeze Dumplings
- Fry Dumplings: Heat a non-stick skillet over medium heat with a small amount of oil. Place the dumplings in the skillet in a single layer and cook for 3-4 minutes or until the bottom is golden brown.
- Steam Dumplings: Add a few tablespoons of water to a skillet and cover with a lid. When the water starts to simmer, add the dumplings, cover with the lid, and steam for 3-4 minutes or until the filling is cooked through.
- Hybrid Method: This is my preferred way to prepare these dumplings. In a large non-stick skillet on medium heat, add 2 tablespoons avocado oil and a quarter cup of water. When water starts to simmer, add a few dumplings and cover with lid. Simmer for 3-4 minutes. Increase heat to medium high and crack lid so water can escape. Fry for 1-3 more minutes to get them good and crispy on the bottom.
- Freeze Dumplings: I always freeze each batch of dumplings and then cook them using the hybrid method. Line a baking sheet with parchment paper. Place dumplings on the sheet as you assemble them, ensuring they do not touch. Place baking sheet in freezer for at least an hour. Once fully frozen, place in a ziplock bag and back in the freezer.When you wish to eat them, you can fry, steam, or do the hybrid method (which I prefer). You can also cook them from frozen for 3-4 minutes in boiling broth for a soup or even with ramen noodles as a fun add-in!
Serve Dumplings
- Garnish with sesame seeds and enjoy with soy sauce, a little rice vinegar, or a chili dipping sauce if you have it. I like to do equal parts rice vinegar and soy sauce!


Jess (admin) here – I’m so happy I was able to share this recipe with y’all. These little dooodes are seriously so versatile! From making these perfectly with my momma to being a lot less particular today in my 40s, they’ll remain a staple for many more years to come. Hope you &/or your family enjoy them as much as we do!